Monday, March 27, 2017

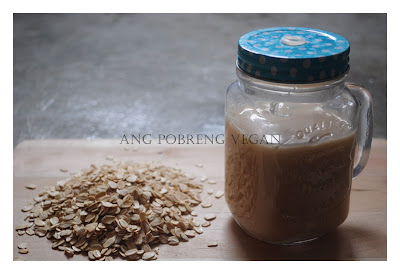
Oat Milk


A few days ago, I ate halo-halo, a Filipino version of shaved ice dessert topped with mixed tropical fruits,  without milk. Unfortunately, it was indeed missing the creaminess of milk. Ever since becoming a vegan, I stopped drinking milk. I am not complaining. There were times when I really wished I never made this decision because I was missing a lot of things. But then again, there are delicious alternatives vegans can try. Although there are non-dairy "milk" alternatives for vegans out there, conventional vegan milk made from nuts like almonds and cashews are just too expensive. Moreover, some vegans are allergic to nuts.  

Being a pobreng (poor) vegan that I am, I decided to make my own cheaper version of vegan milk. There are many cheaper alternatives to vegan nut milk but let me start with this oat milk recipe as I have already tried it. The others like brown rice milk, soy milk and bean milk, I haven’t tried yet. I might try brown rice milk but I doubt that I will post any recipes for soy milk. I am avoiding unfermented soy products because of phytoestrogen, which can worsen my condition.

As expected, oat milk tastes like, well, oats. But if you have been drinking commercial oat milk like the ones you see in the grocery shelves, then this recipe will give you the same results – albeit this version is healthier and cleaner because it does not contain any preservatives and artificial coloring. You can also make this version sugar-free if you want. Drinking oat milk has many nutritional benefits. Oats contain adequate amounts of protein like cow’s milk. It also contains 36% of the recommended daily allowance for calcium compared to whole milk which only contains 28%.

Homemade oat milk is very easy to make and it does not require any special ingredients and kitchen tools. You only need oats, water, salt, and sweetener. Moreover, you only need a blender and a sieve to turn oats into milk.


------------------------------------------------------------
Cuisine: Vegan, Sugar-Free
Serving size: 6 
Preparation time: 20 minutes
Cooking time: 10 minutes

------------------------------------------------------------

Ingredients:

1 cup oats (steel-cut or rolled oats)
3 cups water
1/2 cup coconut sugar
1/4 teaspoon salt
1 teaspoon vanilla (optional)


Instructions:
  1. Place the steel-cut oats in a skillet over low flame and toast it for five minutes or until slightly brown.
  2. Transfer the toasted oats in a blender and add the rest of the ingredients.
  3. Blend until well combined and after the oats have been pulsed into tiny pieces.
  4. Pass through a sieve lined with a clean cloth to separate the oats from the liquid.
  5. This may take a few minutes. Run a spoon along the sieve to help facilitate the  liquid to pass through the sieve.
  6. Adjust the sweetness.
  7. Serve chilled.


The best thing about making oat milk is tat you don't necessarily need to strictly follow the steps nor ingredients. The thing is that you can use the recipe to make other types of non-dairy "milk". Once you are finished with straining the oats, you will end up with a mash. Do not throw it away as you can use it to make vegan cookies and cakes.

There are many versions on how to make oat milk and this happens to be mine. I prefer to toast my oats as it imparts a nutty flavor to the oat milk. The oat milk will keep for a few days in the fridge but since it is so good chilled, mine only lasted for a few hours. Enjoy!

XOXO,

Ang Pobreng Vegan

Thursday, January 19, 2017

Vegan DIY: Make Your Own Turmeric Powder


Turmeric is highly regarded for its anti-inflammatory compounds. It has a warm, spicy and bitter flavor that takes a while to get used to. It comes from the root of Curcuma longa, which is a relative of ginger. It is widely used in both Indian and Chinese traditional medicine because of its healing properties.


It is a good source of iron, manganese, copper and Vitamin B6. It is prized more for its natural compound called curcumin that is its primary pharmacological agent. It is known to cure different maladies like digestion problems and cystic fibrosis. Studies also indicate that turmeric also reduces the risk of cancer and it can also inhibit the metastasis of cancer cells.

I have a habit of drinking turmeric tea every morning. My relationship with turmeric before was a combination of love and hate.  In fact, I wasn’t a big fan of turmeric tea the first time I tried it. I abhor its taste and I don’t like the thought of drinking a vile concoction just to reap its health benefits.

But ever since I planted turmeric in my garden, I learned how to love this super root. I have to! Otherwise I wouldn’t know what to do with all my harvests. Hahaha!


This plant grows well in the tropics and I have several planted in my garden. I have already harvested turmeric several times in the past and have used it to make my own herbal tea. As a poor vegan,  I don’t like the idea of buying the expensive powder from the grocery store. Thus, I decide to grow and make my own turmeric powder from scratch.

Making your own turmeric powder is a messy affair. There are no standard steps to making your own. Instead, I like to list down tips of making the powder so that you will have a mess-free kitchen and clean hands to boot.

  • Clean the harvested roots and remove traces of soil and dirt on them. Pat them dry or allow them to air dry on the counter for a few hours.
  • Slice the turmeric thinly so that they will easily dry up under the sun. Use gloves to avoid dying your hands yellow. If you don’t like using disposable gloves like I do, then use your hands by all means. In any case, the yellow stain will eventually go away after a few days as long as you wash your hands frequently.
  • Use a ceramic plate when slicing the turmeric to prevent messy stains on your chopping board. I find using the ceramic plate crude but cleaning up the mess is really easy.
  • No dehydrator? No problem! Place all sliced turmeric on a baking tray and look for an undisturbed spot in your garden that gets a lot of sun. Use solar power to dry your turmeric. If you are worried about foreign particles getting on to the turmeric, place a mesh cloth over them. That should prevent dusts and other particles from getting on the turmeric.
  • Once they are dry, pop them inside a 175-degree Celsius preheated oven for about 15 minutes just to sanitize them and also to draw out their natural oil.
  • Use a blender or a coffee grinder to grind your turmeric.
  •  Store in a clean bottle with the right label. Keep the bottle in a cool, dark and dry place.
Drinking turmeric tea is simple. Some people try to improve its flavor by adding sugar or honey but since I try to avoid all forms of sweeteners except those naturally occurring in fruits, I have to take my turmeric plain or add other ingredients.


I often take my turmeric with crushed mint leaves and moringa powder. Drinking turmeric tea grows on you. At first,  I cannot say that it is delicious but as I kept on drinking this concoction every day, it seemed nice. Not delicious – just nice!

Making your own turmeric powder is a fun activity. I especially love the oven and grinding part because my kitchen would smell like peppers and oranges all at the same time. Enjoy drinking!


XOXO,

Ang Pobreng Vegan

Friday, March 25, 2016

Vegan DIY: Making Your Own Mung Bean Sprouts


This is how your pot should look like
after two days.
Sprouting your own seeds is a necessary skill if you really want to become a sustainable vegan. Sprouting is not rocket science and anyone can do it. But why should you eat sprouts? Sprouts contain a lot of enzymes than most uncooked fruits and vegetables. It is also a good source of protein which vegans like me need in order to prevent our muscles from wasting. The process of sprouting also breaks down the seed which means that the digestive system has less work thus making it a great food for people who have gut problems.

You can buy ready-to-eat sprouts in the wet market but there is a higher risk of contamination due to improper food handling. Personally, I enjoy making my own sprouts because I know that that they are clean and I can munch on them raw.  I can also make sure that the environment where my sprouts grow us clean so I know that it is safe to eat them. I use clean water and make sure to drain it constantly.

There are many techniques on how to sprout your seeds. And the technique varies depending on what seeds you want to sprout. For this tutorial, I will focus more on sprouting mung beans.  I tried sprouting mung beans in the past but was never really successful. I tried the usual method of soaking them in a bowl full of water but after a day, it emitted a foul smell. Even replacing the water did not help remove the odor so, in the end, I have to throw everything out. Well, the technique that I am about to share with you is a no-brainer that when I discovered it, I had this now-why-haven’t-I-thought-about-it-before moment. Below are the steps on how to sprout mung beans fool-proof.


1.)    Clean mung beans and remove the dirt and other debris.
2.)    Soak the mung beans in a bowl of water and leave it at room temperature overnight.
3.)   Drain the liquid the next day and transfer the contents to a clean pot lined with a clean cloth at the bottom.
4.)    Set the pot on top of a bowl. The bowl will catch the water dripping from the pot so that it does not stagnate on the bottom of the pot.
5.)    Pour water over the pot every two hours and drain the water that has collected inside the bowl.
6.)    Cover the pot using a clean cloth (I used a clean pillow case for my mung beans).
7.)    Make sure that the mung beans are always moist and that the liquid in the bowl are always discarded.
8.)  Let your mung beans grow until it grows to a 1 to ½ inch long. It can take 24 hours or longer for the mung beans to germinate depending on where you live. Here in the tropics, it will only take 24 to 48 hours for the beans to sprout to the desired length.
9.)    Clean the sprouts and remove the seed coat.
10.) Store in the fridge until further use.

There you have it. Making sprouts is easy (and hygienic, too!) and you can make your own whenever you need them.


XOXO, 

Ang Pobreng Vegan

Sunday, February 21, 2016

Vegan Dinumugan


Dinumugan is a type of suman (rice cake) dessert that hails from the island of Bohol - my parents' hometown. This is the first vegan dessert that I have ever made. It is basically made from coconut meat, rice flour and ripe bananas. What I love about this recipe is that the bananas are naturally sweet so you don't need to put any free sugar in it (not that mine had any). Free sugar is defined as any form of sweet crystalline substance obtained from plants like sugar cane or beets. It is also commonly known as table and white (brown) sugar.  

Traditional dinumugan is very sweet because the recipe calls for white sugar. This recipe is all natural and is full of fiber that can aid in digestion. Moreover, it is so easy to make that I was able to make my first batch with success. Beginner's luck perhaps? For this healthy banana-rice cake recipe, below are the things that you will need:

------------------------------------------------------------
Cuisine: Vegan, Gluten-Free
Serving size: 3 to 4 (makes 18 small rice cakes)
Preparation time: 20 minutes
Cooking time: 15 minutes
------------------------------------------------------------

Ingredients:

5 cups ripe bananas, mashed
1 cup rice flour
1 cup coconut meat, shredded
1 cup water 
5 pitted dates, soaked overnight (optional)


Instructions:
  1. In a food processor or blender, blend the dates until it purees into smooth mixture.
  2. Combine all ingredients in a bowl and mix well.
  3. Scoop a tablespoon of the mixture onto a  banana leaf and roll the leaf just as you would      in making spring rolls.
  4. Continue doing the third step until you finish packing all the mixture inside the banana leaves
  5. Steam for 15 minutes.
  6. Let it cool before serving.


By the way, I used dates as sugar substitute but you can always opt to leave it out. I happen to have dates because my sister gave me a pack of it. If you have difficulty finding them, you can always use coconut sugar or other natural sweeteners that you can find except honey as it is not vegan. But if you are not a vegan but you just want to try this recipe, you can use honey anytime. 

This recipe is so good that it did not have a chance to cool down at all.  Although still hot, we ate it for lunch. Surprisingly, even the non-vegans and sugar-lover members in the family loved this recipe. I cannot wait to make this recipe again in the future. I hope you can enjoy it too.

XOXO,

Ang Pobreng Vegan

Monday, February 1, 2016

Why Did I Become Vegan?

I eat a combination of raw and cooked vegetables and fruits.
The thing is that I eat anything plant-based. This is what my small pantry looks like. 

I used to be a voracious meat eater but something happened to my health a year ago that made me decide to go completely plant-based this year. I was diagnosed with a 4cm uterine fibroid. I have been trying to go full vegan last year but with the lack of commitment, I still ate meat. I guess I was really reliant on conventional medicine as I underwent monthly hormonal replacement therapy to hinder its growth. So I kept on eating meat, chips and anything that can make my evil baby (fibroid) grow. I felt assured that my medication will completely put its growth to a stand still.

So fast forward six months, I was asked to get another ultrasound. To my horror, it grew to 5.5cm and my gynecologist wanted to perform full hysterectomy (remove my uterus) otherwise I will suffer the debilitating consequences. I am still single with no history of childbirth and this news gave me overwhelming stress and depression. I just had my left ovary removed less than two years ago due to cysts and now they want me to give up another organ.


Inside the fridge. More fruits and other edible plant parts.

I know that my doctor is looking after my welfare but there has got to be another way. Journals after journals, I read and found out that adopting a plant-based diet might help me solve the problem of my fucked up reproductive system. And so I became a vegan. In fact, I have been a vegan for more than a  month now. 

I cannot say that I feel good (not yet) because it is too early to tell if things have indeed changed. Plus, I need to get another ultrasound six months from now to see if my efforts paid off. I guess I am putting all my faith on this lifestyle out of desperation of not losing another organ. The thing is, vegans all over the world have their own stories to tell why they became one in the first place. This just happens to be mine.


XOXO,

Ang Pobreng Vegan

Check Me Out